Brewhouse efficiency can be defined as the percent of grain sugar that’s converted into sugar in the wort, while taking into account the various losses from your equipment setup.
Chasing brewhouse efficiency issues is a common theme when browsing any number of homebrew forums. It seems a lot of home brewers get caught up in chasing brewhouse efficiency numbers, trying to get the highest efficiency as possible.
We homebrewers, should be more focused on hitting a consistent brewhouse efficiency across every one of our batches. Chasing brewhouse efficiency issues can drive you crazy, but there’s a few things we can do to maximize our efficiency numbers and get consistent results in every beer we brew.
The Trouble With Chasing Brewhouse Efficiency Issues
Since brewhouse efficiency really comes down to the amount of sugar you are converting from your fermentable grain, logic dictates that you want the number to be as high as possible.
Why? Because the higher your brewhouse efficiency number the less grain you need in your mash. Less grain = fewer dollars.
Now this logic may hold true if you are brewing up barrels at a time, but should it apply to homebrewers that are cranking out a 5-gallon batch once or twice a month?
Let’s look at some numbers…

The above chart assumes brewing a beer the weighs in at 1.049 OG. It compares the amount of grains required if your brewhouse efficiency is 70% vs. 80%, and the associated cost of those grains. As you can see, it will cost you an additional $1.65 to make up the difference in a 10% efficiency loss. I don’t know about you, but I’ll spend a few extra dollars on grain, if it’s going to save me endless frustration trying to hit a higher efficiency number.
Another thing to keep in mind is brewhouse efficiency also looks at the various losses from your brewing setup. Losses are an inevitable part of the brewing lifecycle.
If you were planning on brewing a 5.5-gallon batch but were only able to get 5 gallons into the fermenter, your brewhouse efficiency will take a hit. These losses could come from anywhere in your brewing process:
- Mashing
- Boiling
- Transfers
While it’s inevitable that you will have losses, accurately predicting what these losses are will help to ensure you have a consistent brewhouse efficiency number across all your brews.
Steps to Improve Brewhouse Efficiency
Before you can focus on getting a consistent efficiency, you need to try and maximize your efficiency as much as possible. Once you taken these basic steps, then we can focus on maintaining a consistent efficiency.
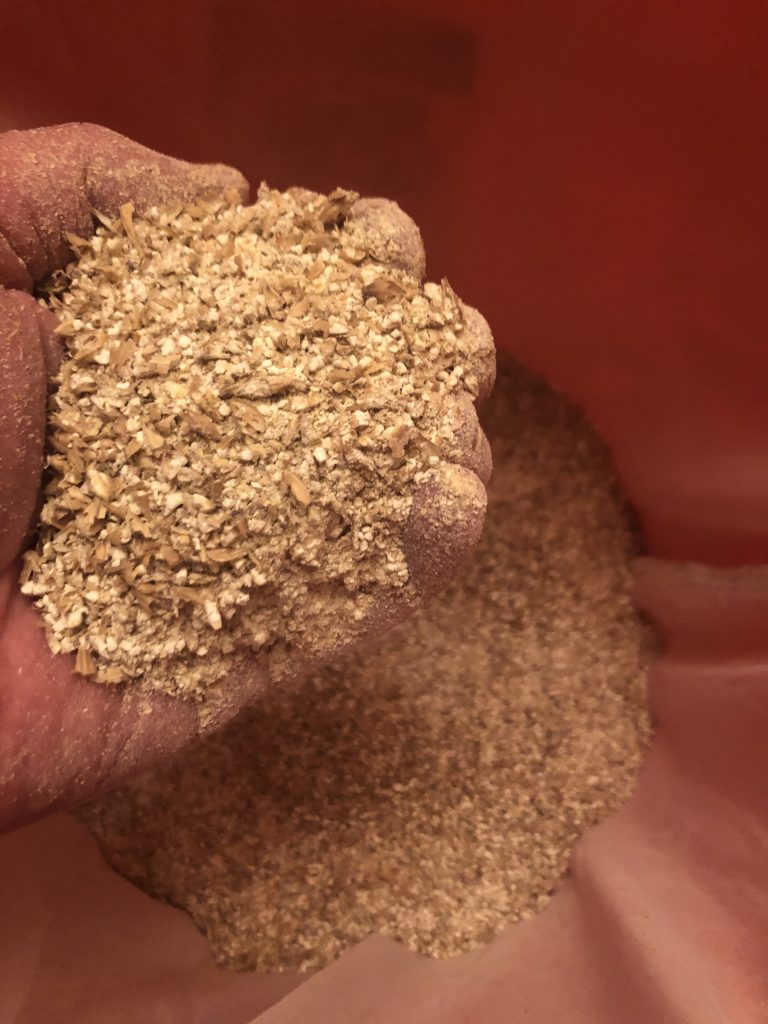
The single easiest thing to focus on to improve your brewhouse efficiency is the grain crush. We’ve all been there. Relying on your local homebrew store to crush your grains isn’t going to get you where you want to be.
The gap on the grain mills the LHBS has is meant to accommodate a wide range of brewing equipment, and chances are it doesn’t match your setup. Besides, most businesses are trying to make money. Their focus isn’t to sell you less grain with a great crush on their grain mills, they want to sell you that extra pound of grain.
Crush Your Own Grains
Purchase yourself an inexpensive grain mill, like the Cereal Killer, so you can crush your own grains. That investment will allow you to set a crush that matches your equipment, and easily gain another 10 points on your efficiency.

Circulate Your Mash
Now you don’t need to go off and buy a new pump so your mash is constantly being recirculated, but you do want to try and circulate things as much as you can. The easiest way to do this is to stir the shit out of your mash throughout the mash cycle.
Once I mash in, I’ll stir the thing like my life depended on it. Give it a good 2 – 3 min stir to break up any dough balls. I give things another good stir at the 10 – 15 min. mark, and a final stir 10 – 15 min. before the mash is complete. This alone should give you at least another 5 efficiency points.
With these two simple steps, you should be able to eke out another 10 – 15 points in your mash efficiency.
Steps to Get A Consistent Brewhouse Efficiency
So now that we’ve done some basic improvement to increase our efficiency, what can we do to ensure we get a consistent efficiency across all of our brew days?
Know your equipment! It’s extremely important to understand your brewing setup in intimate details. Once you’ve figured that out, it’s pretty easy to be consistent.
It’s not going to happen overnight. You’re going to have to brew 2 – 3 times, taking very detailed notes, to hone in your equipment profile. These following three steps will make life easier for you and allow you to get to a consistent brewhouse efficiency.
Determine Your Boil Off Rate
Boil off rate is the amount of wort that is lost during your boil. If you boil off less then you estimate, your efficiency will suffer, and you won’t be able to hit your Original Gravity. Boil off more then your estimate, your Original Gravity will be higher, but your volume will suffer.
The easiest way to calculate this is to fill your boil kettle with 2 – 3 gallons of water, being sure you accurately measure the volume of water you add. Boil that for 15 minutes, and measure the remaining water in the kettle. You can do this using a larger measuring cup. The difference between your starting and ending volume is your boil off rate for 15 minutes. Multiply that figure by 4, and you have your hourly boil off rate.
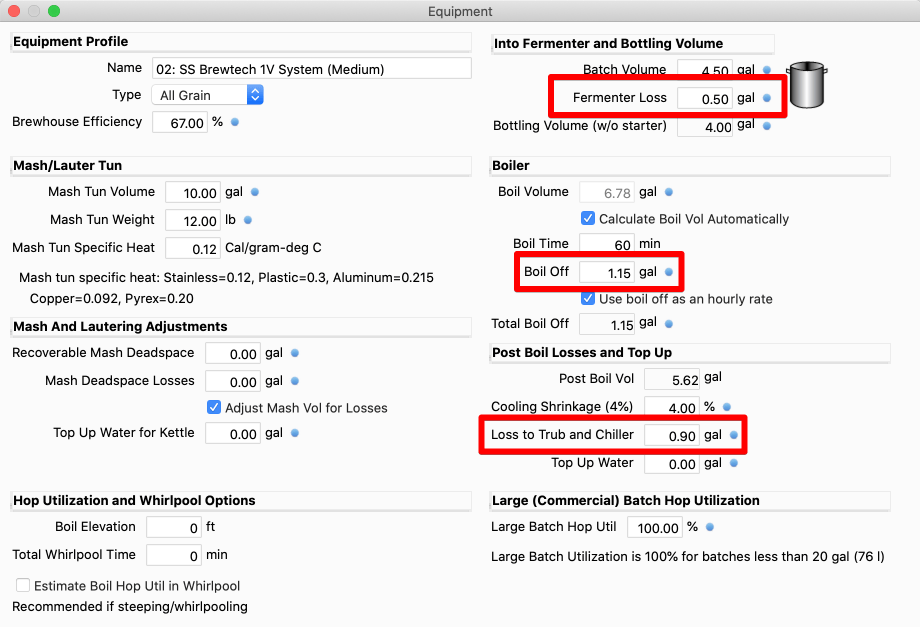
My boil off rate for my electric BIAB set up is just over 1 gallon/hour, actually 1.15 gallons.
Determine Your Kettle Loss
Kettle loss is the amount of wort that remains in your kettle after racking to your fermenter. A number of home brewers don’t like to rack all of the trub at the bottom of the kettle, so that remaining liquid is your kettle loss. If you’re a dumper, that just empties the entire kettle into your fermenter, your kettle loss is zero.
To accurately calculate your kettle loss, you’ll need to break out that measuring cup once again. After you’ve cooled your wort and racked it to the fermenter, you can simply measure the volume of wort that remains in the kettle. That’s your kettle loss.
You need to be pretty consistent with your racking process to accurately estimate your kettle loss. In my case, I prop a tile under the front of my kettle after cooling and let the trub settle to the back of the kettle for about 10 minutes. I then rack that wort until it gets to a certain point in my kettle, where it just starts pulling that trub in.
My kettle loss is a bit on the higher side, at just under 1 gallon. I try to limit the amount of crud I’m racking to the fermenter.
Determine Your Fermenter Loss
Fermenter loss is the amount of beer that you lose when packaging. It’s the remaining beer that’s mixed in with the yeast cake and hop matter at the bottom of the fermenter.
To calculate your fermenter loss, we’ll use that large measuring cup again. After packaging, empty the contents of your fermenter into the measuring cup to determine your fermenter loss.
I would suggest doing all 3 of these steps across 2 or 3 different brew days to ensure you are getting accurate measurements. You should be somewhat consistent in what you are measuring, otherwise your process is inconsistent.
Setting Up Your Equipment Profile
So now that you have all of these measurements, what are you supposed to do with them? Hopefully you are using some type of brewing software, BeerSmith, Brewer’s Friend, BrewFather, etc… to automate your brew day. Each of these software applications have a place to enter your equipment profile, where you can identify your losses.
With this information properly identified, the software will automatically adjust the amount of brewing water and grains required to hit your target Original Gravity based upon your entered Brewhouse Efficiency.

Wait – So What Is My Brewhouse Efficiency?
Well that’s what we still need to figure out isn’t it? Once you’ve set up your equipment profile, part of that process is to identify your default Brewhouse Efficiency. It’s going to take you a few brewing sessions to dial this in.
I would start with a number of around 70%, which you’ll tweak either up or down across the 2 – 3 brew days where you’re trying to sort this out. Don’t worry about missing your Brewhouse Efficiency number during these initial brew days, we’ll get there.
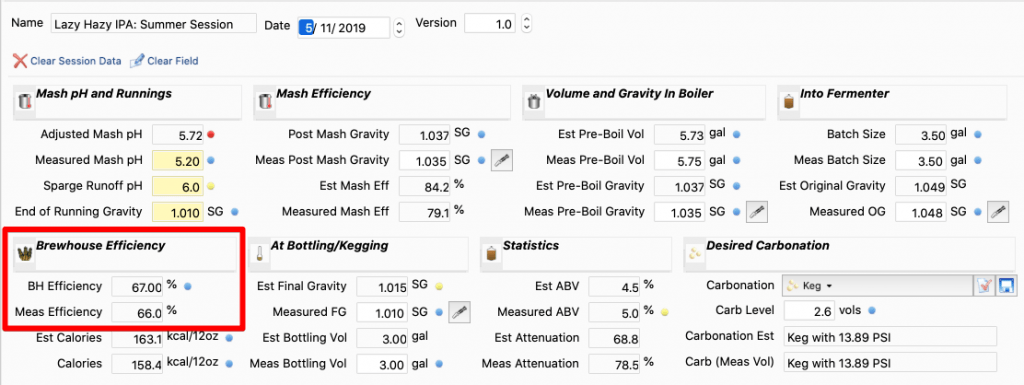
After your initial brew day, enter the appropriate numbers from your brewing session into the Session Data. This will include:
- Post Mash Gravity Reading
- Pre-Boil Volume (after the mash)
- Measured Original Gravity (OG)
- Measured Batch Size (amount into the fermenter)
The software you are using will determine what your actual Brewhouse Efficiency was.

Now that you have that calculated Brewhouse Efficiency, you can use that number for your next brew day. Again, make sure you are taking accurate readings, and with a little bit of luck, you should be pretty close to the efficiency from your initial brew day. If not, adjust as needed. After your second or third brew cycle, you should be able to see some consistency.
In my case, I have a Brewhouse Efficiency of 67%. Now that’s a little lower than I’d like it to be, but I honestly don’t get too caught up with that. I’ve been consistently hitting that 67% (give or take 1%) across all my brew sessions, which is really what I’m after.
Conclusion
Don’t get frustrated chasing brewhouse efficiency issues. There’s nothing magic to this; it just takes a little bit of work getting to know your brewing equipment.
It took me about a year before I got tired of the inconsistency. Once I went through the effort of measuring things out after each step of the brewing cycle, I was able to get to the consistency I was looking for.
Reach out if you have any questions, and I’d be happy to help if I can.
Cheers…
Yeah, I concur, crush is the biggest factor in efficiency from my experience. I did pretty much exact same recipe – a Guinness clone – with a rough crush from local home brew shop and then again a second batch of it with my own ‘pulverised’ crush (not worried about stuck sparge since I do BIAB).First batch OG hit 1.040 and second batch hit 1.050, 3.8% vs 4.8% ABV in final beer – mostly all down to crush!
Crazy isn’t it!